Home : Workshop : Woodwork :
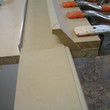
 Two piece, 2 - 1/4", top mounted crown that can have whatever reveal you want, e.g. 1/4" reveal to cabinet (the mock-up in the foreground) or doors. Its made with a Grizzly bit in a table router. The white fence was originally built for routing lock miters but I use it for everything. The clamped on MDF provides a tunnel that is the same size as my stock (5/8 x ~2 - 5/8", wide enough for a full miter on the bottom). Once the stock is routered, it needs two passes (top edge first, leave a hair of flat) on the tablesaw (38deg is standard, I needed 40, the saw scale or router bit are off... bit is 40).
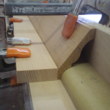
 The base piece also gets a 38deg. miter and I use a jig (image) to glue it to the crown. The key part of the jig is a round-over profile to match the cove in the crown. You could set it up anyway you want. For me the aluminum stop and loose round-over worked fine. If you tilt the spring clamps they can provide both down and forward pressure. With MDF I had almost perfect alignment on the bottom edge, a hard block sander evened things up quite nicely. There's also an image showing the full glue-up.
The next thing to try is lipped crown that will work with half-overlay upper cabinets. This will require at least 3/4" material which should be able to provide a slight reveal. I ran a 3/4" piece with the above, but cut the base to 21mm, i.e. flush to door face (19 door + 2 bumper, no reveal), without thinking it through. The jig would have to be setup with an 8mm strip underneath the base piece.
 ...I took a slightly diferent approach when extending the base of stock 3-1/4" crown. I made an L from some leftover Maple PB (I spaced out on the 3/4" loss, so the base of the L is 3/4" shorter than I wanted). The cove in the crown had a 3/4" radius so the only tricky part was ripping the 3/4" radiused MDF stop to the correct width. The crown was pretty bowed ao I used a lot of clamps. Using spring clamps, I veneered the bottom to make the seam go away.
Custom Crown
 Two piece, 2 - 1/4", top mounted crown that can have whatever reveal you want, e.g. 1/4" reveal to cabinet (the mock-up in the foreground) or doors. Its made with a Grizzly bit in a table router. The white fence was originally built for routing lock miters but I use it for everything. The clamped on MDF provides a tunnel that is the same size as my stock (5/8 x ~2 - 5/8", wide enough for a full miter on the bottom). Once the stock is routered, it needs two passes (top edge first, leave a hair of flat) on the tablesaw (38deg is standard, I needed 40, the saw scale or router bit are off... bit is 40).
 The base piece also gets a 38deg. miter and I use a jig (image) to glue it to the crown. The key part of the jig is a round-over profile to match the cove in the crown. You could set it up anyway you want. For me the aluminum stop and loose round-over worked fine. If you tilt the spring clamps they can provide both down and forward pressure. With MDF I had almost perfect alignment on the bottom edge, a hard block sander evened things up quite nicely. There's also an image showing the full glue-up.
The next thing to try is lipped crown that will work with half-overlay upper cabinets. This will require at least 3/4" material which should be able to provide a slight reveal. I ran a 3/4" piece with the above, but cut the base to 21mm, i.e. flush to door face (19 door + 2 bumper, no reveal), without thinking it through. The jig would have to be setup with an 8mm strip underneath the base piece.
 ...I took a slightly diferent approach when extending the base of stock 3-1/4" crown. I made an L from some leftover Maple PB (I spaced out on the 3/4" loss, so the base of the L is 3/4" shorter than I wanted). The cove in the crown had a 3/4" radius so the only tricky part was ripping the 3/4" radiused MDF stop to the correct width. The crown was pretty bowed ao I used a lot of clamps. Using spring clamps, I veneered the bottom to make the seam go away.
Comments [ new ]
- Re: Custom Crown
- Posted by Peter Kasper on Sunday, 25-Jun-2023
Thank you for your incredible work and extreme dedication to detail. I have learned alot from your posts and insight.
[ reply | link ] to this. Go to [ topic | top ]
In the midwest, we build exclusively face frame cabinets with top cabinets and two piece crown running directly to the ceiling.
Do you use this crown on cabinets going to the ceiling?
